Once the application has been configured and published, it’s time to test it. You can view the application on the Microsoft My Apps page (https://myapps.microsoft.com).
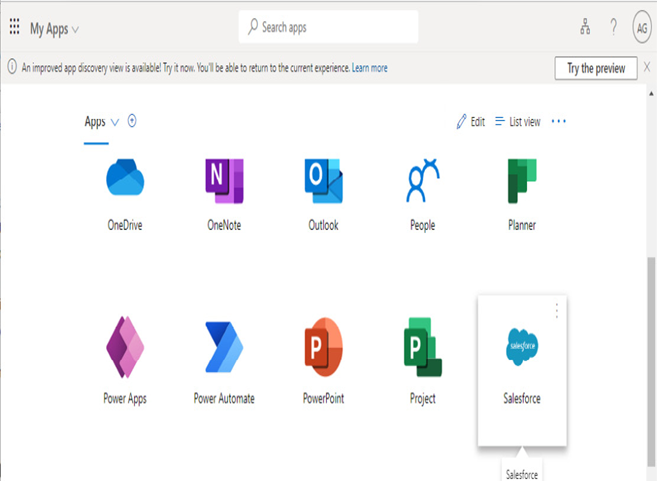
Figure 9.29 – Viewing the My Apps page
During the single sign-on configuration process, the SAML application is looking for user identity data to be provided. The application attempts to match the sign-on name presented by Azure AD, the IdP, to an account located in the application’s account database.
If the application and parameters have been configured correctly and a user with the same sign-in name exists in the application, users can now be signed in. Some applications may require the user to select an Azure AD SSO option the first time they log in, as shown in the following figure:
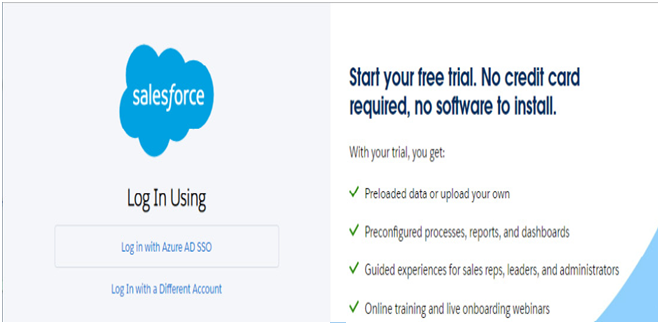
Figure 9.30 – Logging in to an application via Azure AD single sign-on
Configured applications may allow additional provisioning integration as well to enable a fully-automated solution. Provisioning solutions ensure that users created in Azure AD and added to the application security group are automatically configured in the corresponding SaaS application. Be sure to review the individual documentation for each app you configure for additional configuration features.
Summary
In this chapter, you learned about using the capabilities of integrating Azure AD with both on-premises applications (via Azure AD App Proxy) as well as external SaaS applications. These two features allow you to provide your organization with a single interface for accessing applications, regardless of where the users or applications are located.
As an administrator, it’s important to be aware of how applications are accessing your data. As a best practice, you should plan on reviewing application permissions in the Azure AD and Microsoft 365 Defender portals on a regular basis.
In the next chapter, we will learn about configuring and deploying Microsoft 365 apps.
Knowledge check
In this section, we’ll test your knowledge of some key elements from this chapter.