Mail flow rules are configured inside the Exchange admin center (https://admin.exchange.microsoft.com) under Mail flow | Rules or through Exchange Online PowerShell.
In this example, we’ll configure a mail flow rule that redirects incoming mail sent to the members of a technical support distribution group to the service ticketing mailbox:
- Navigate to the Exchange admin center (https://admin.exchange.microsoft.com), expand Mail flow, and select Rules.
- Select Add a rule:
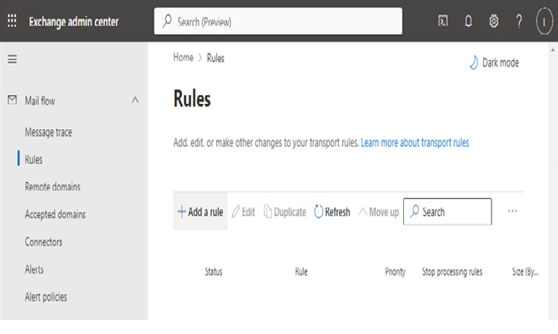
Figure 11.8 – Mail flow rules
- From the pop-up menu, select Create a new rule.
- On the Set rule conditions page, enter a Name label for the rule. Under Apply this rule if, select The sender. In the second dropdown, select is external/internal and then select Outside the Organization. Click Save to configure the first part of the condition.
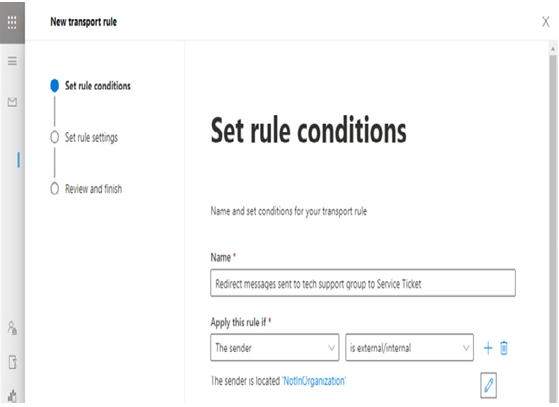
Figure 11.9 – Configuring the first condition
- Next to the condition, click the + button to add another condition. In the first dropdown of the second condition, select The recipient. In the second dropdown of the second condition, select is a member of this group and then choose a group from the address list.

Figure 11.10 – Configuring the second condition
- Under the Do the following section, expand the first dropdown and select Redirect the message to.
- Expand the second dropdown under the Do the following section and select these recipients. Select a recipient from the address book and click Save. See Figure 11.11.
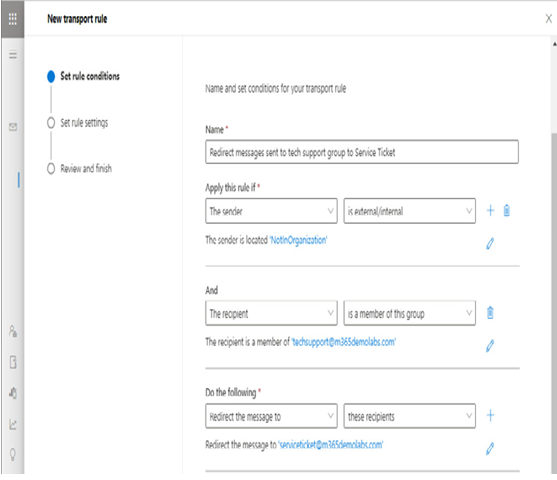
Figure 11.11 – Configuring the action
- Click Next.
- On the Set rule settings page, select the mode for the rule:
• Enforce enables the rule, while the two test modes don’t put the rule into action but instead allow you to generate notifications that tell you whether the message would have triggered the rule. To use the test modes, you need to configure a Generate an incident report action.
• You can also specify a Severity level for the rule, which will be displayed when you run message traces.
• You can select the timeframe for which the rule should be active.
• Additionally, you have options to determine whether you will stop processing more rules after this one executes or defer the message and rerun it through the mail transport queue if the rule processing times out.
• Finally, for Condition criteria, you can determine what parts of the message are used for matching sender criteria (Header, Envelope, or Header and Envelope).
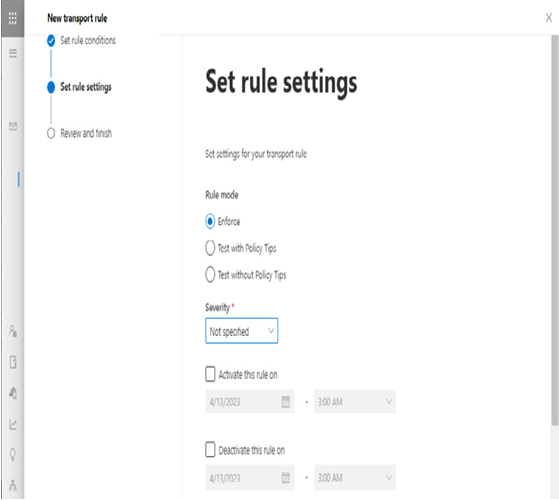
Figure 11.12 – Set rule settings
- Click Next.
- Review the rule settings and click Finish to save the new rule.
- Click Done to return to the Rules page.
After you have configured a new rule, it is still in a Disabled state. You must update the rule by sliding the Enable or disable rule toggle to Enabled, as shown in Figure 11.13.
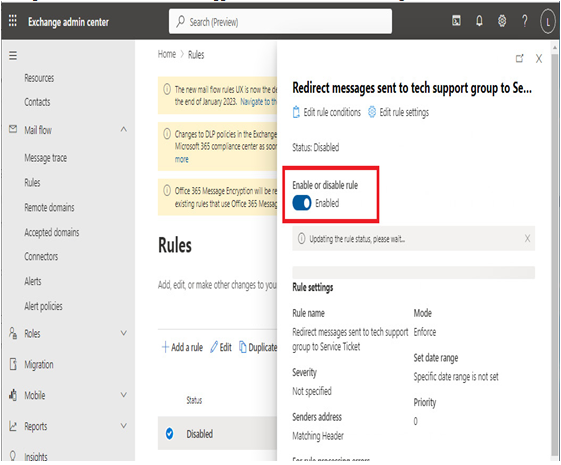
Figure 11.13 – Enabling the rule
It may take up to 30 minutes for it to become active. Once the rule is active, Microsoft recommends sending test messages to ensure that it is performing as you anticipate.